Sending an Invoice in InvoiceHela
Introduction
Once your invoice is created in InvoiceHela, sending it to your client is quick and flexible. You can send directly after creation or resend any existing invoice from your invoice list.
Ways to Send an Invoice
- Option 1 – From Create View: After creating your invoice, open the Actions menu and select Save & Send. This saves the invoice and immediately opens the sending page.
- Option 2 – From Invoice Table: Go to Invoices in your dashboard, find the invoice you want to send, and click Resend.
Sending Page Overview
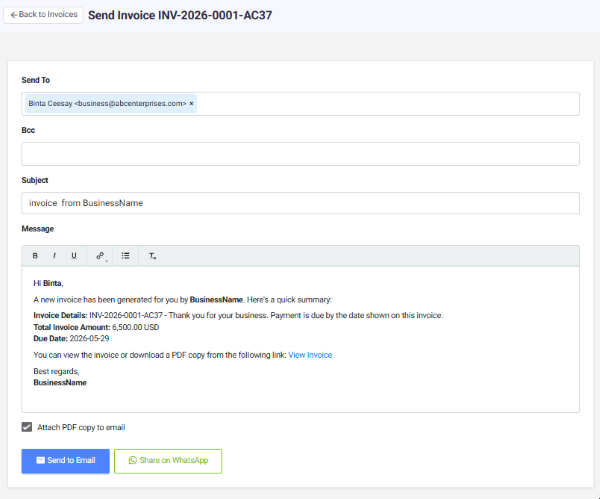
On the Send Invoice page, you can customize and finalize your email before sending:
Email Details: Add or confirm recipient addresses in the Send To field. You can also include Bcc recipients if needed.
Subject & Message: Customize your email subject and message directly here, or manage default templates in Business Settings → Business Customizations → Emails & Notes.
Sending Options
- Send to Email – Sends the invoice directly to your client’s inbox.
- Attach PDF Copy – Optionally include a downloadable PDF version of the invoice.
- Share on WhatsApp – Instantly share the invoice link with your client via WhatsApp.
Smart Customization
All outgoing invoice emails are automatically branded with your business identity — including your logo, sender name, and unique domain name. This ensures every invoice looks professional and consistent with your brand.
Invoice Link Access
Clients can also view and pay their invoice directly through your business’s unique domain link (e.g., https://your_domain.invoicehela.com/invoices/...). Once payment is made, the invoice is automatically marked Paid and a receipt is generated.
✅ Summary
Whether you send via email or WhatsApp, InvoiceHela makes invoicing effortless — fully branded, automated, and ready for instant payment.